Are you looking to elevate your YouTube channel but unsure how to export your videos for the best quality? Do you find yourself confused by the different export settings in Adobe Premiere Pro? You’re not alone! Many content creators struggle with the final step of video production, which can make or break the quality of their uploads. In this guide, we’ll break down the essential steps for encoding and exporting your videos in Adobe Premiere Pro.
Step 1: Setting Up Your Project
Start a New Project: Open Adobe Premiere Pro and create a new project. Name your project and select a location to save it.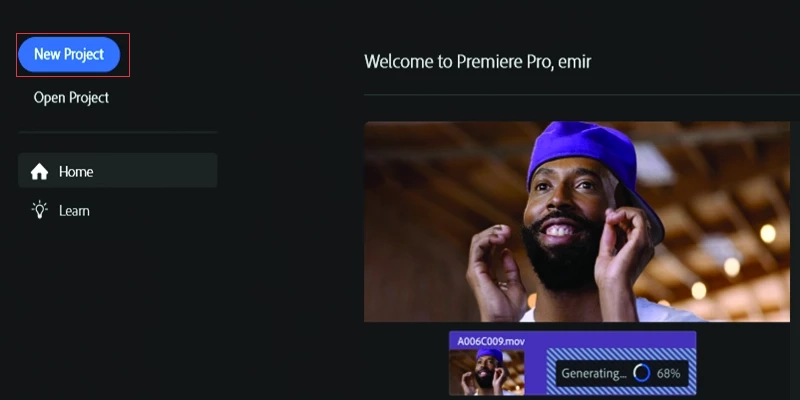
Import Media: Go to File > Import or drag and drop your video files into the Project panel. Organize your media files into bins if necessary.
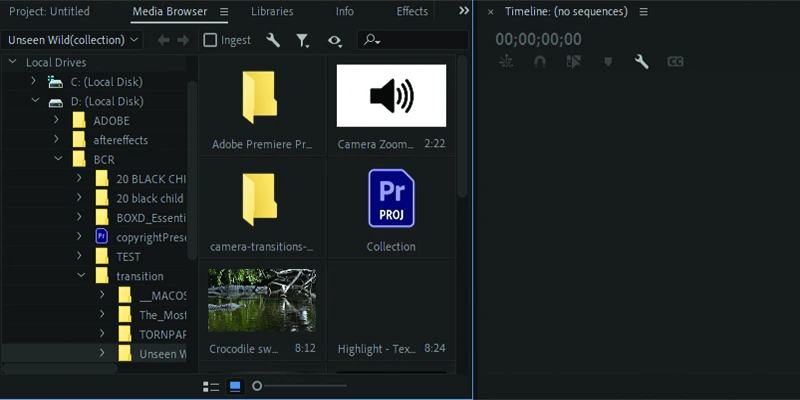
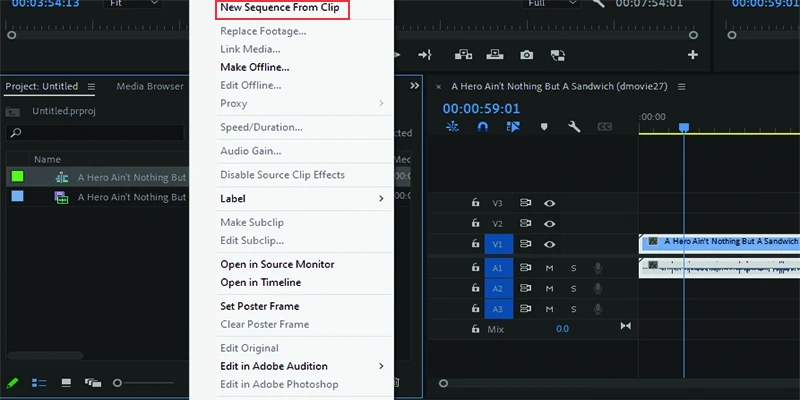
Create a Sequence: Right-click on your video file in the Project panel and select New Sequence from Clip. This will automatically create a sequence with the same settings as your video.
2. Editing Your Video
Edit Your Footage, use the timeline to trim, cut, and arrange your clips. Add transitions, effects, titles, and other elements to enhance your video.
Use the Lumetri Color panel for color correction and grading to make your video visually appealing. Adjust audio levels, add background music, and apply audio effects using the Audio Track Mixer and Essential Sound panel.
3. Configuring Export Settings
Open Export Settings: Once you’ve finished editing, make sure the sequence you want to export is selected. Go to File > Export > Media or press Ctrl + M (Cmd + M on Mac).
Choose Format and Preset: In the Export Settings window, set the Format to H.264. Then, choose a Preset that matches your desired output resolution, such as YouTube 1080p Full HD or YouTube 4K Ultra HD.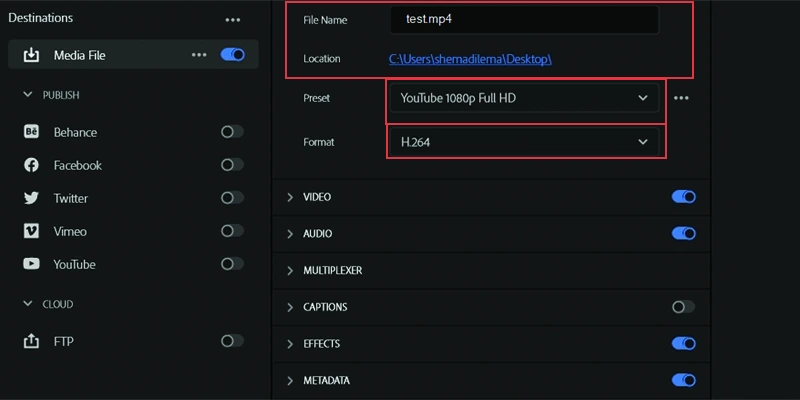
Adjust Video Settings:
- Under the Video tab, ensure the Width and Height match your desired resolution.
- Set the Frame Rate to match your source footage (e.g., 24, 30, or 60 fps).
- Set Field Order to Progressive.
- Aspect should be set to Square Pixels (1.0).
- TV Standard should be NTSC (for North America) or PAL (for Europe).
- Profile should be set to High and Level to 4.2 or higher, depending on the resolution.
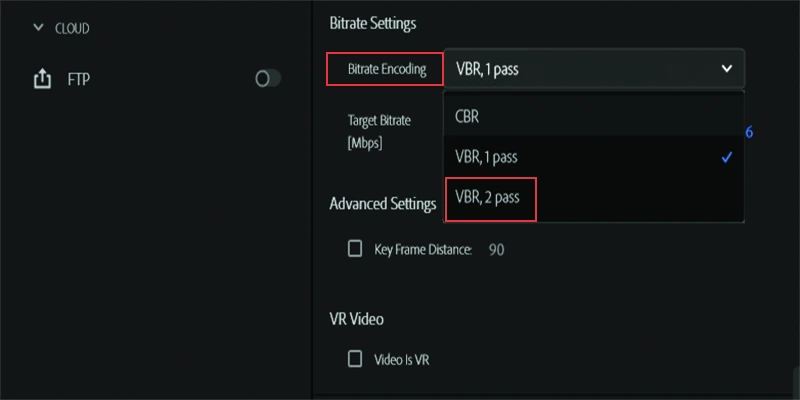
Bitrate Settings: Choose Bitrate Encoding as VBR, 2 pass.
Set the Target Bitrate and Maximum Bitrate according to YouTube’s recommendations:
- 1080p: Target 8 Mbps, Max 16 Mbps
- 1440p: Target 16 Mbps, Max 24 Mbps
- 4K: Target 35-45 Mbps, Max 53-68 Mbps
Audio Settings: Click on the Audio tab, set Audio Codec to AAC, Sample Rate to 48 kHz, and Bitrate to 320 kbps.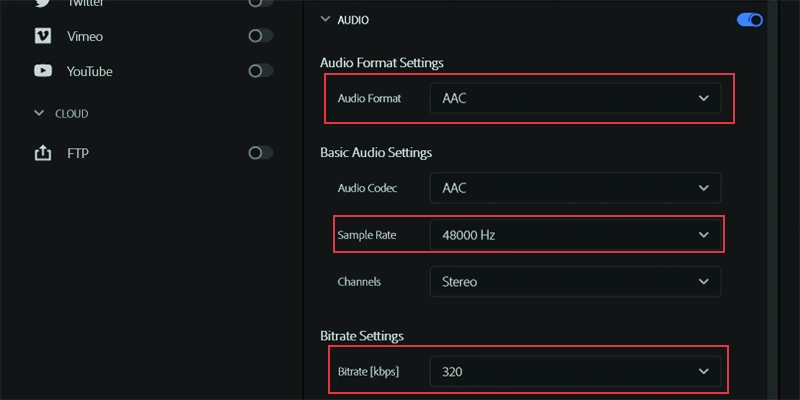
4. Exporting Video
Output Name and Location: Click on the blue file name next to Output Name to choose a name and location for your exported file.
Export: Once all settings are configured, click on Export to start the encoding process. Alternatively, you can click Queue to send the project to Adobe Media Encoder, allowing you to continue working in Premiere Pro while the export is in process.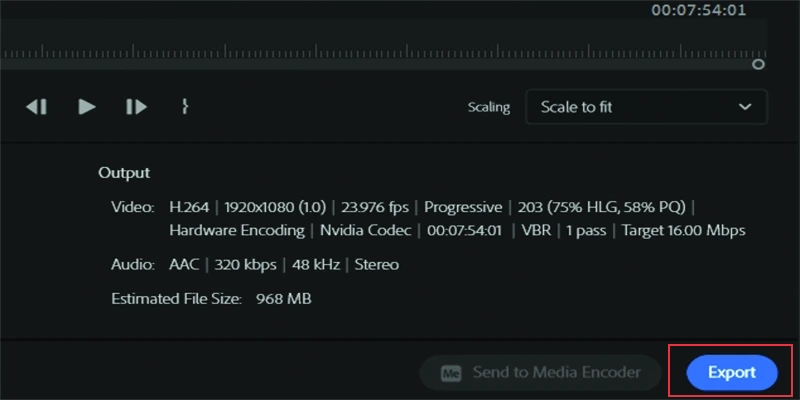
Video Quality Optimization
To optimize video quality, consider using two-pass encoding with variable bitrate (VBR) for enhanced quality while keeping file sizes manageable. Ensure that the export frame rate matches your original footage to maintain smooth motion. Remember that high-quality audio is just as crucial as video, so use a higher audio bitrate for clear sound.
Additionally, if your video contains intricate details or fast action, experiment with higher bitrate settings to improve overall quality without significantly increasing file size.
book a free call
Secure a one-on-one meeting to transform your digital video content. It’s straightforward, impactful, and crafted just for your brand. Expect nothing less than pure results-no fluff, all substance.


