In the world of video production and motion graphics, alpha channels play a crucial role in defining transparency and compositing elements seamlessly. If you’re using Adobe After Effects to create your visuals, exporting an alpha channel can ensure that your video elements maintain their transparency when used in other projects or software.
Understanding alpha channels
Color information in After Effects is contained in three channels: red (R), green (G), and blue (B). In addition, an image can include an invisible fourth channel, called an alpha channel, that contains transparency information. Sometimes, such an image is referred to as an RGBA image, indicating that it contains an alpha channel.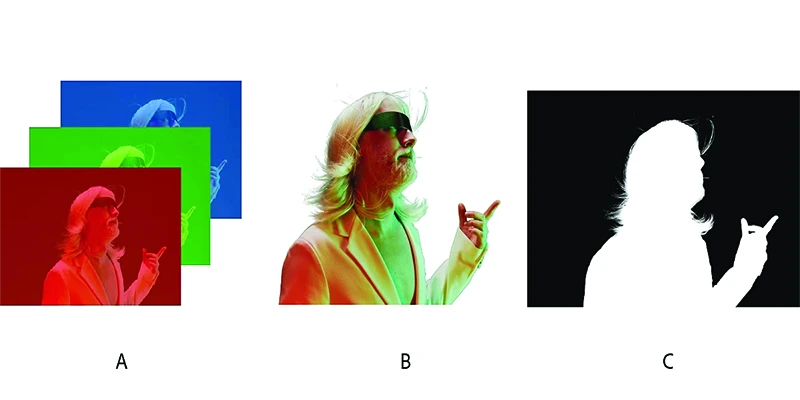 A. Separated color channels
B. Alpha channel represented as a grayscale image
C. Composite using all four channels with a background showing through transparent areas
Many file formats can include an alpha channel, such as Adobe Photoshop, ElectricImage, FLV, TGA, TIFF, EPS, PDF, and Adobe Illustrator. AVI and QuickTime videos saved at a high bit depth can include alpha channels, which vary depending on the codec used for encoding the images within these files.
When dealing with Adobe Illustrator EPS and PDF files, After Effects will transform blank spaces into an alpha channel automatically. Some programs can store multiple alpha channels in one image, but After Effects only interprets the fourth channel as an alpha channel.
Exporting alpha channels in After Effects
Step 1: Preparing Your Composition
Before you export your alpha channel, you need to make sure your composition is ready. Launch After Effects and open the project containing the composition you want to export.
Step 2: Configuring Output Settings
Once your composition is prepared, its time to configure your output settings.
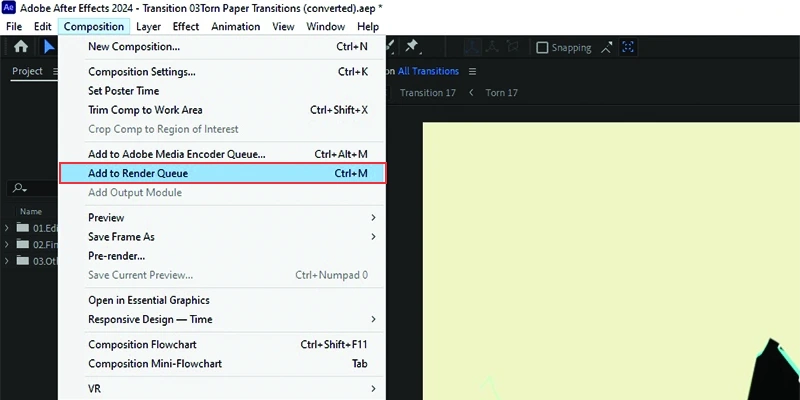
Add Composition to Render Queue: Go to Composition > Add to Render Queue to move your composition to the Render Queue panel.
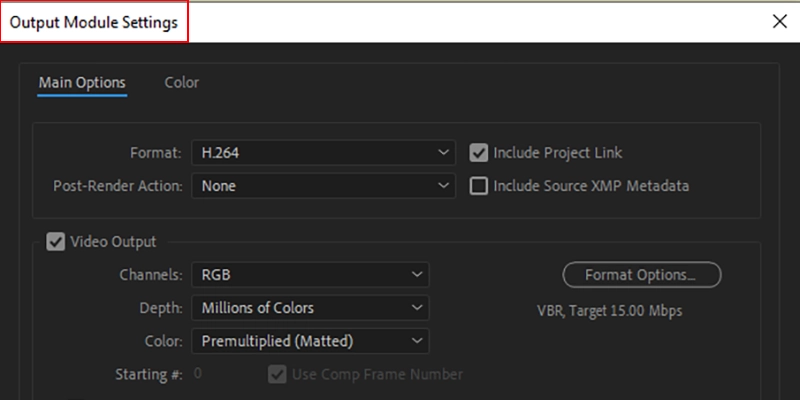
In the Render Queue panel, click on the “Output Module” settings. This is where you’ll configure how your file will be exported.
Step 3: Choosing the Right Format
Choosing the right format is crucial for preserving the alpha channel. Here’s a list of formats that support alpha channels:
QuickTime (MOV): With the Animation codec or ProRes 4444 codec.
PNG Sequence: Ideal for sequences with high-quality transparency.
TIFF Sequence: Another option for high-quality image sequences with alpha channels.
To select a format:
Format: Click on the “Format” dropdown menu and choose QuickTime for MOV files or PNG Sequence for PNGs.
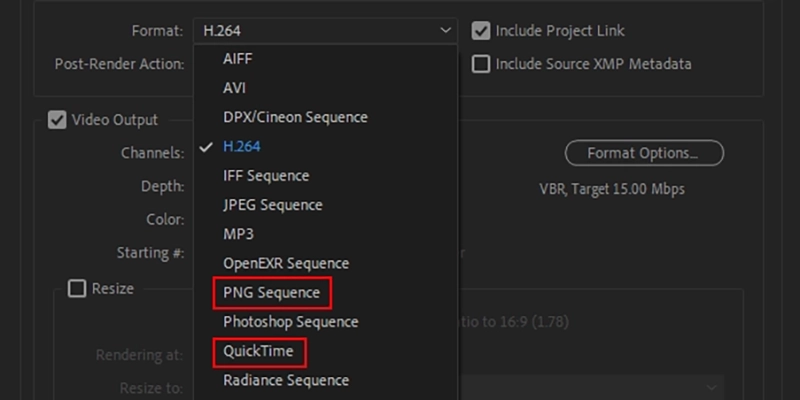
Codec: If you chose QuickTime, click on the “Format Options” button. For MOV files, select Animation or ProRes 4444 from the codec list to ensure alpha channel support.
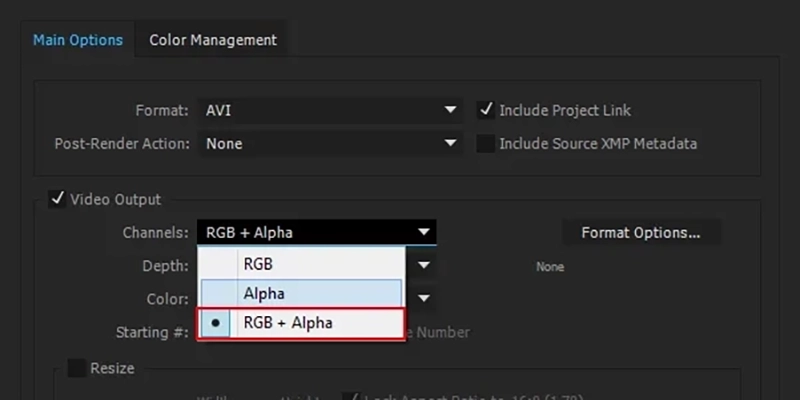
Channels: Make sure that the “Channels” setting is set to RGB + Alpha to include the alpha channel in your export.
Step 4: Exporting Your File
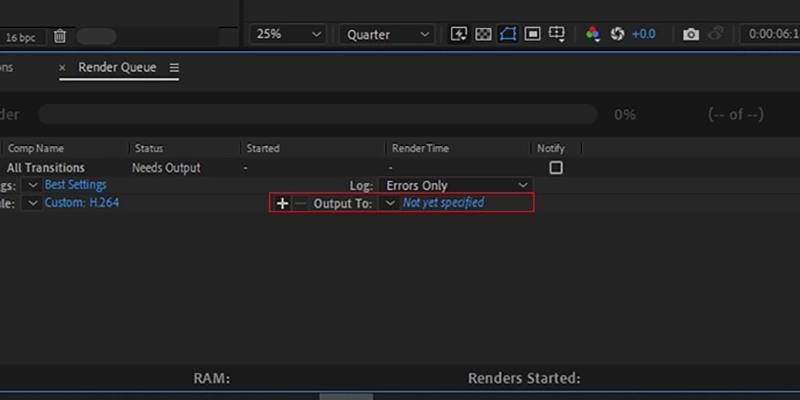
Select Output Location: Click on the “Output To” section to choose the location where your file will be saved.
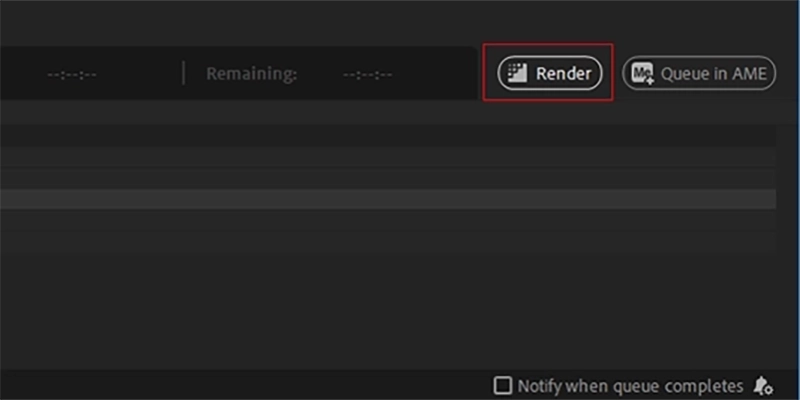
Render: Click the “Render” button to start the export process. After Effects will process the composition and create a file with the alpha channel included.
book a free call
Secure a one-on-one meeting to transform your digital video content. It’s straightforward, impactful, and crafted just for your brand. Expect nothing less than pure results-no fluff, all substance.


