Have you ever wished you could magically add or remove elements in your photos with ease? Or maybe expand photo without interrupting any pixel? Adobe Photoshop’s Generative Fill tool, part of Adobe’s Firefly AI family, is here to help—and it’s simpler than you might think!
What is Generative Fill?
Generative Fill allows users to make creative edits quickly, powered by AI. Need to expand an image, remove an unwanted object, or add new elements? This tool can do it all, transforming complex edits into a smooth, user-friendly experience. It’s perfect for photographers, graphic designers, or anyone wanting to enhance their images without deep editing skills.
How Does It Work?
The tool works by analyzing your selection and “imagining” how to blend new elements with your existing image. Simply select the area to adjust, use Generative Fill, and let the AI work its magic. With a few clicks, you can create high-quality composites, refine backgrounds, or even dream up entire scenes.
Step 1
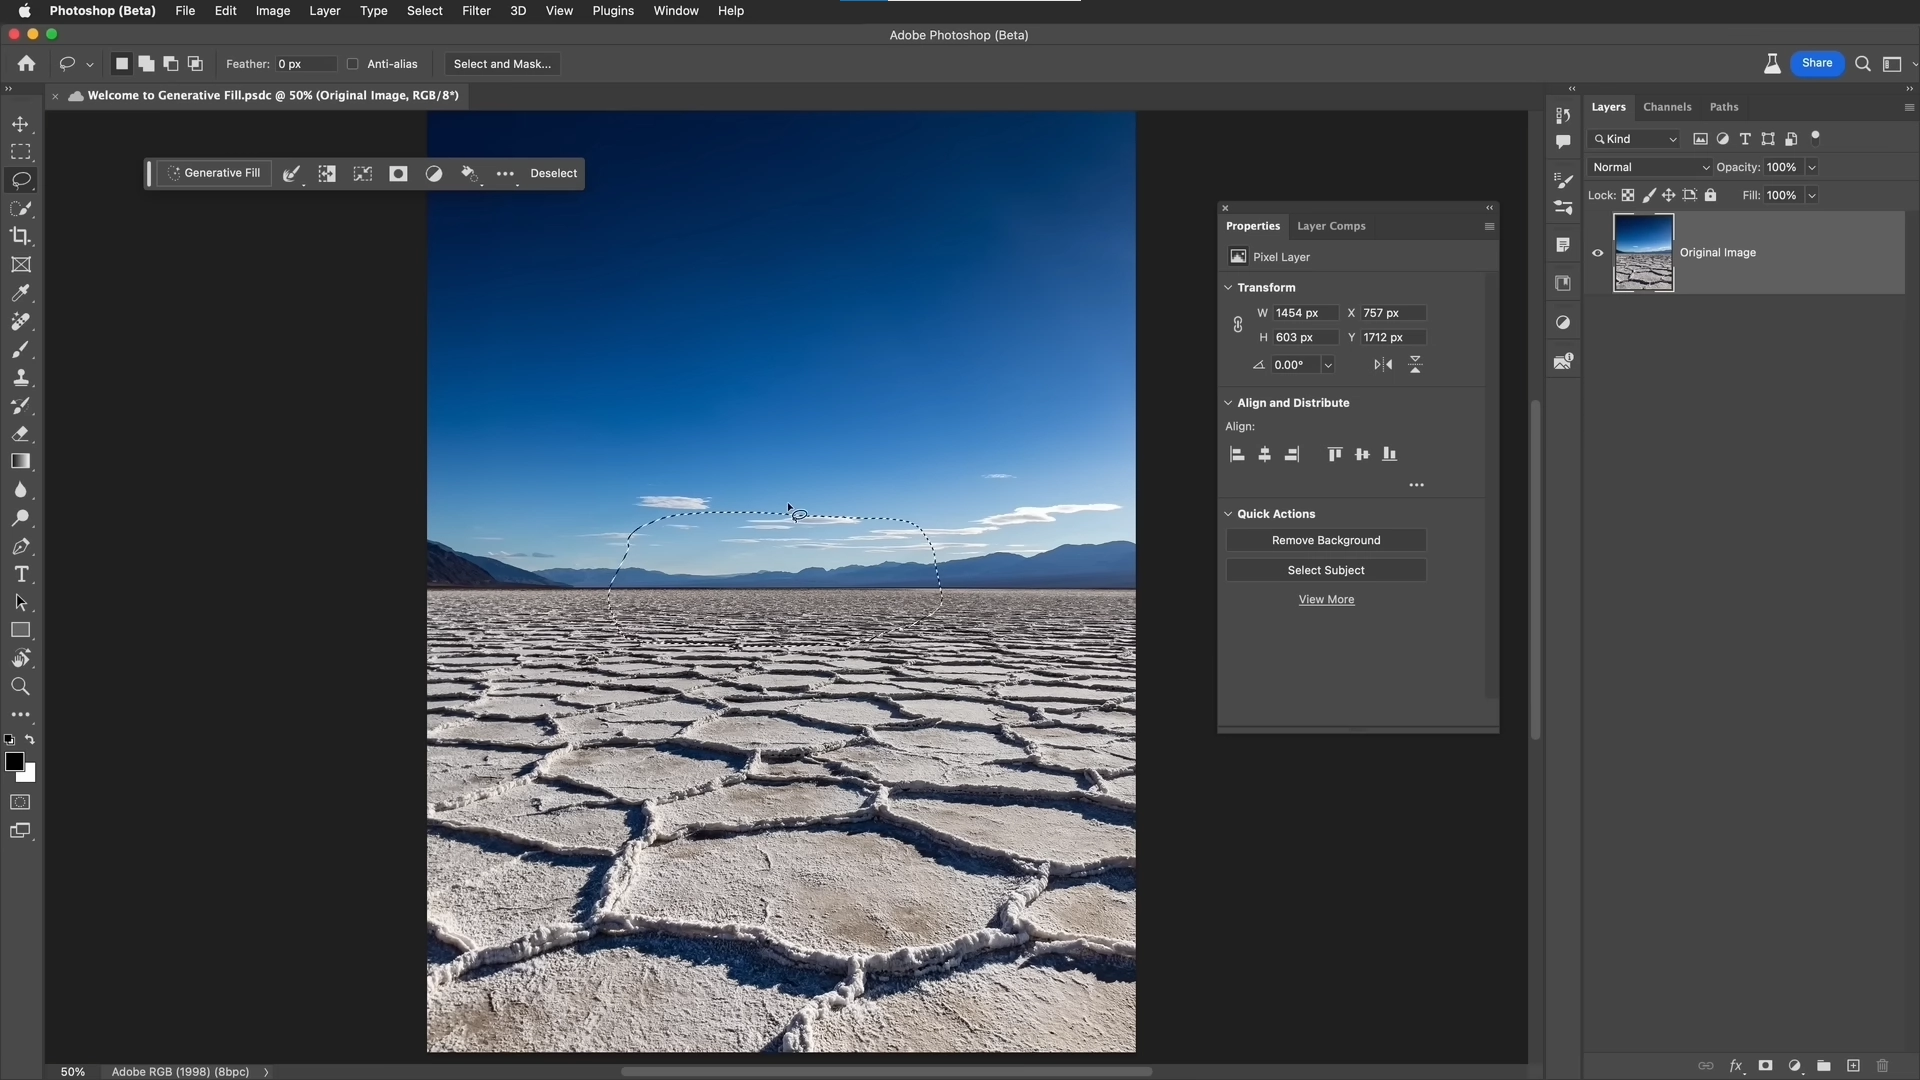
Open your image in Photoshop, and use any selection tool (like the lasso or marquee) to outline the area you want to modify.
Step 2
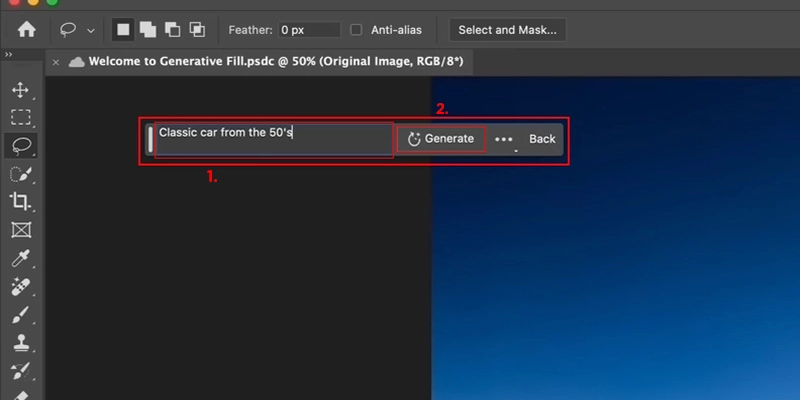
Click on Generative fill. Type in what you want to be represented (eg. “Classic car from the 50’s”).
Click Generate and let it do its magic.
Step 3
Photoshop gives 3 samples of its work to choose from. Choose the best one that fits your needs. This Ai feature perfectly implements the given command, with shadows, reflections and everything.
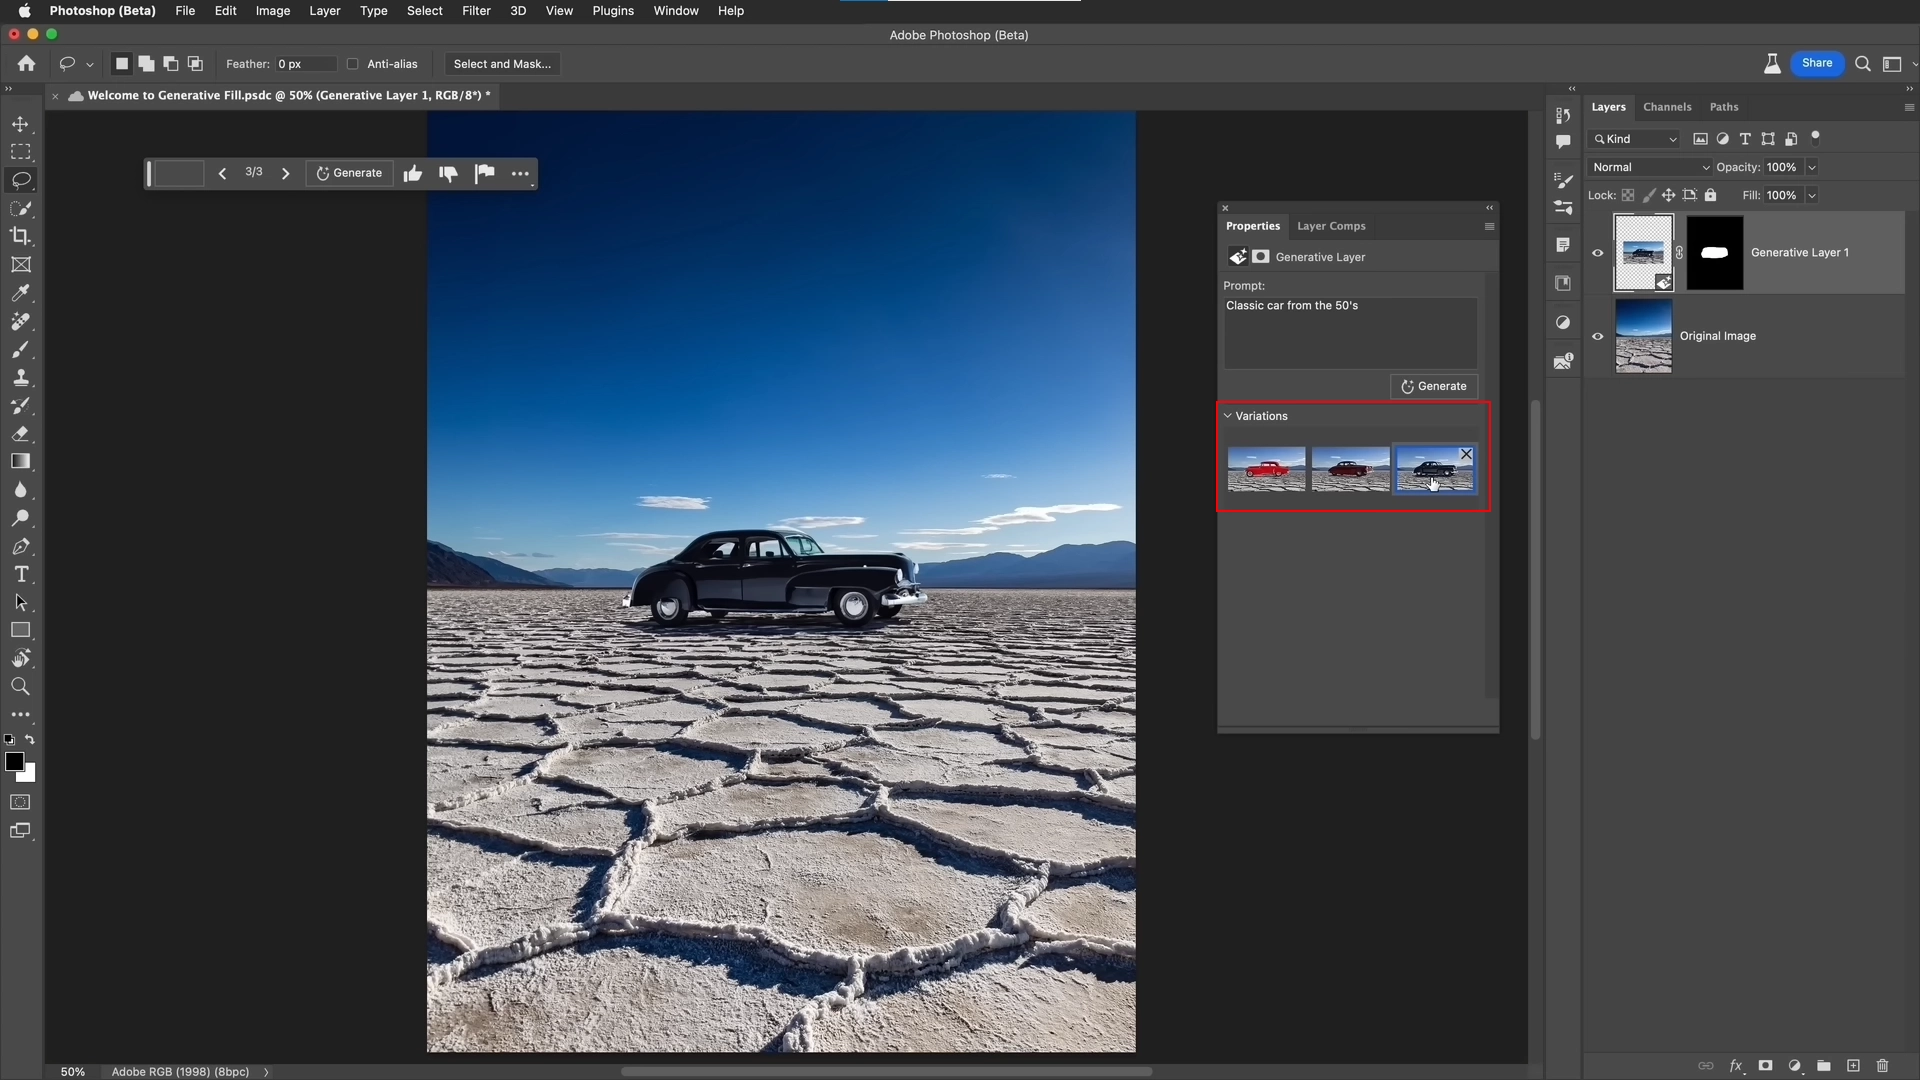
Step 4
Now lets make another selection, this time we typed in command “Reflection pool with blue water”, and again hit generate.

Because we created new selection, it will create new generative layer. Once again, it will give 3 examples of its work to choose from.
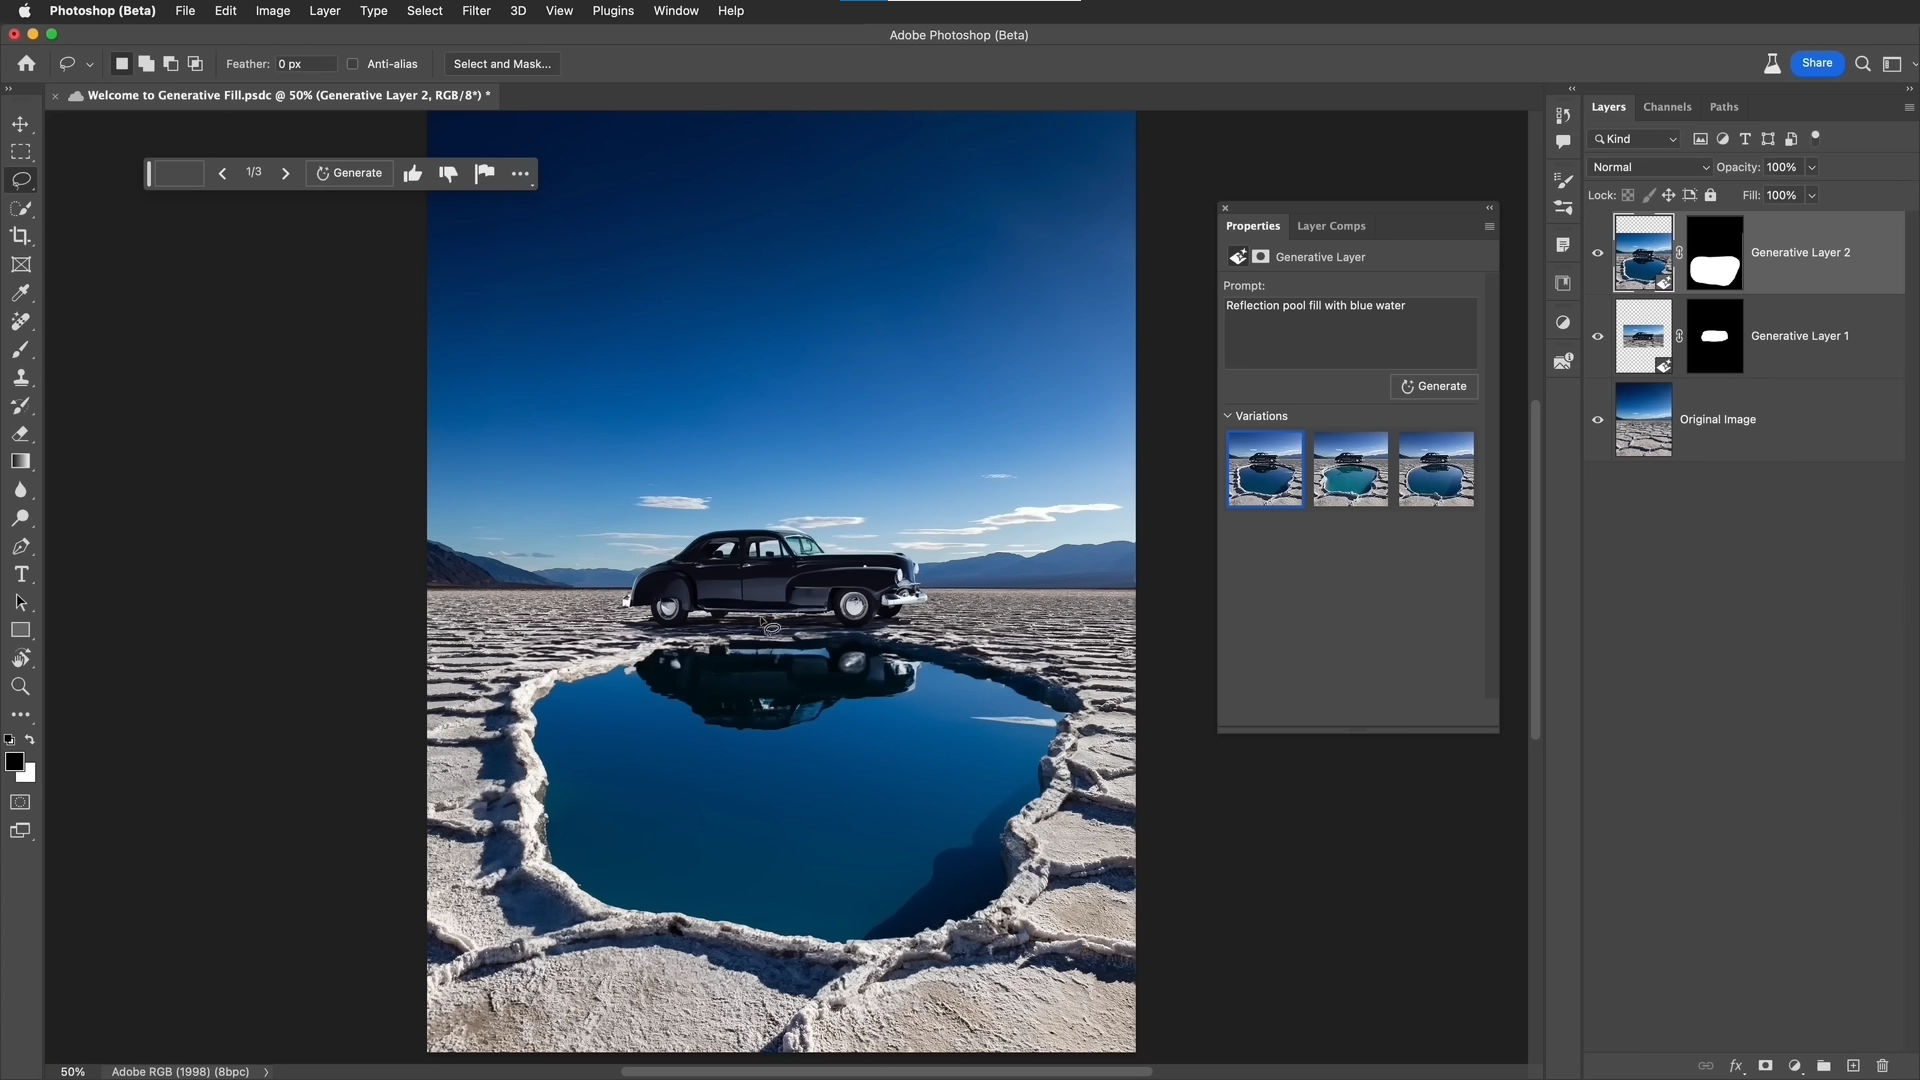
Perfectly created edges of the lake with its shadows, reflection of the car and sky, and you can even see under the car because of the angle of the camera.
Step 5
Now for the final touch, we are going to expand the picture. Using Crop tool, we are going to stretch it to make panorama. Double click to save changes.
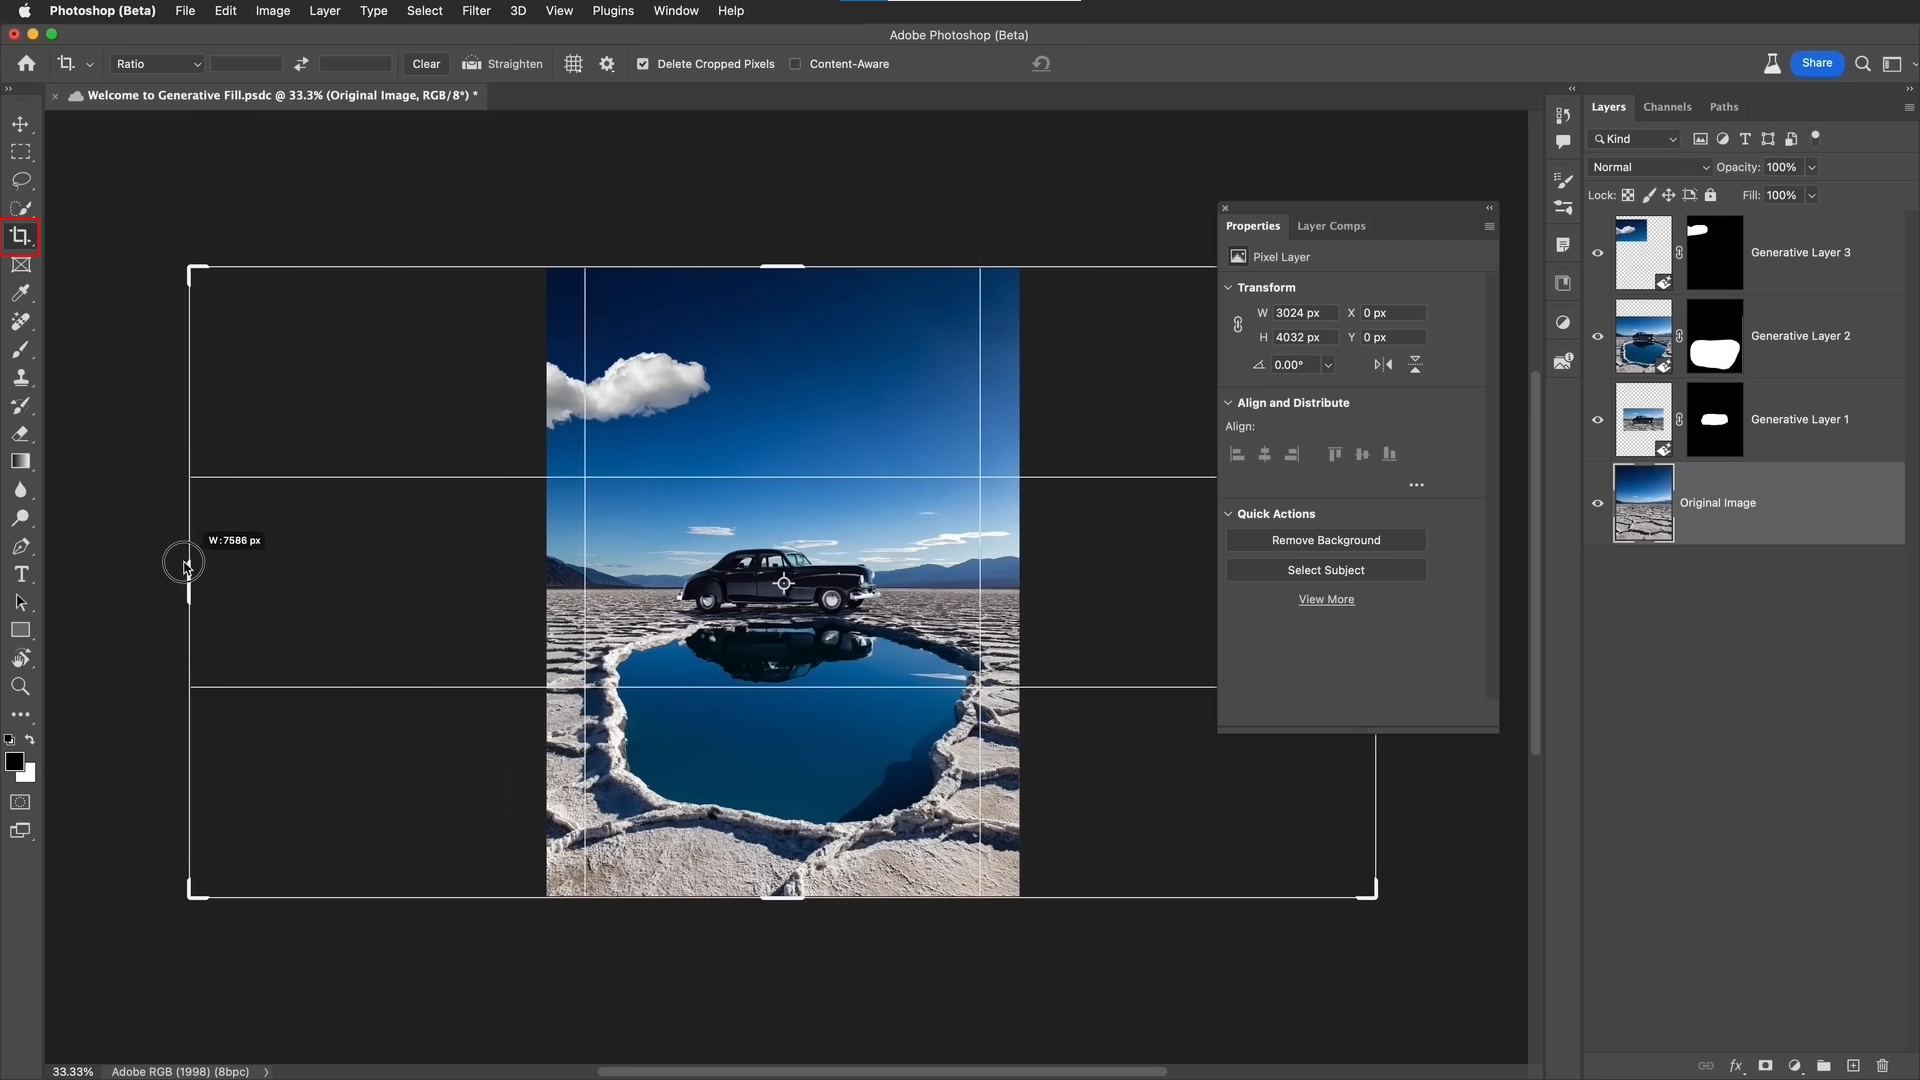
After resizing, we are going to make a selection of the work area using rectangular marquee tool. After selecting the area, click on “invert selection” on pop-up window. 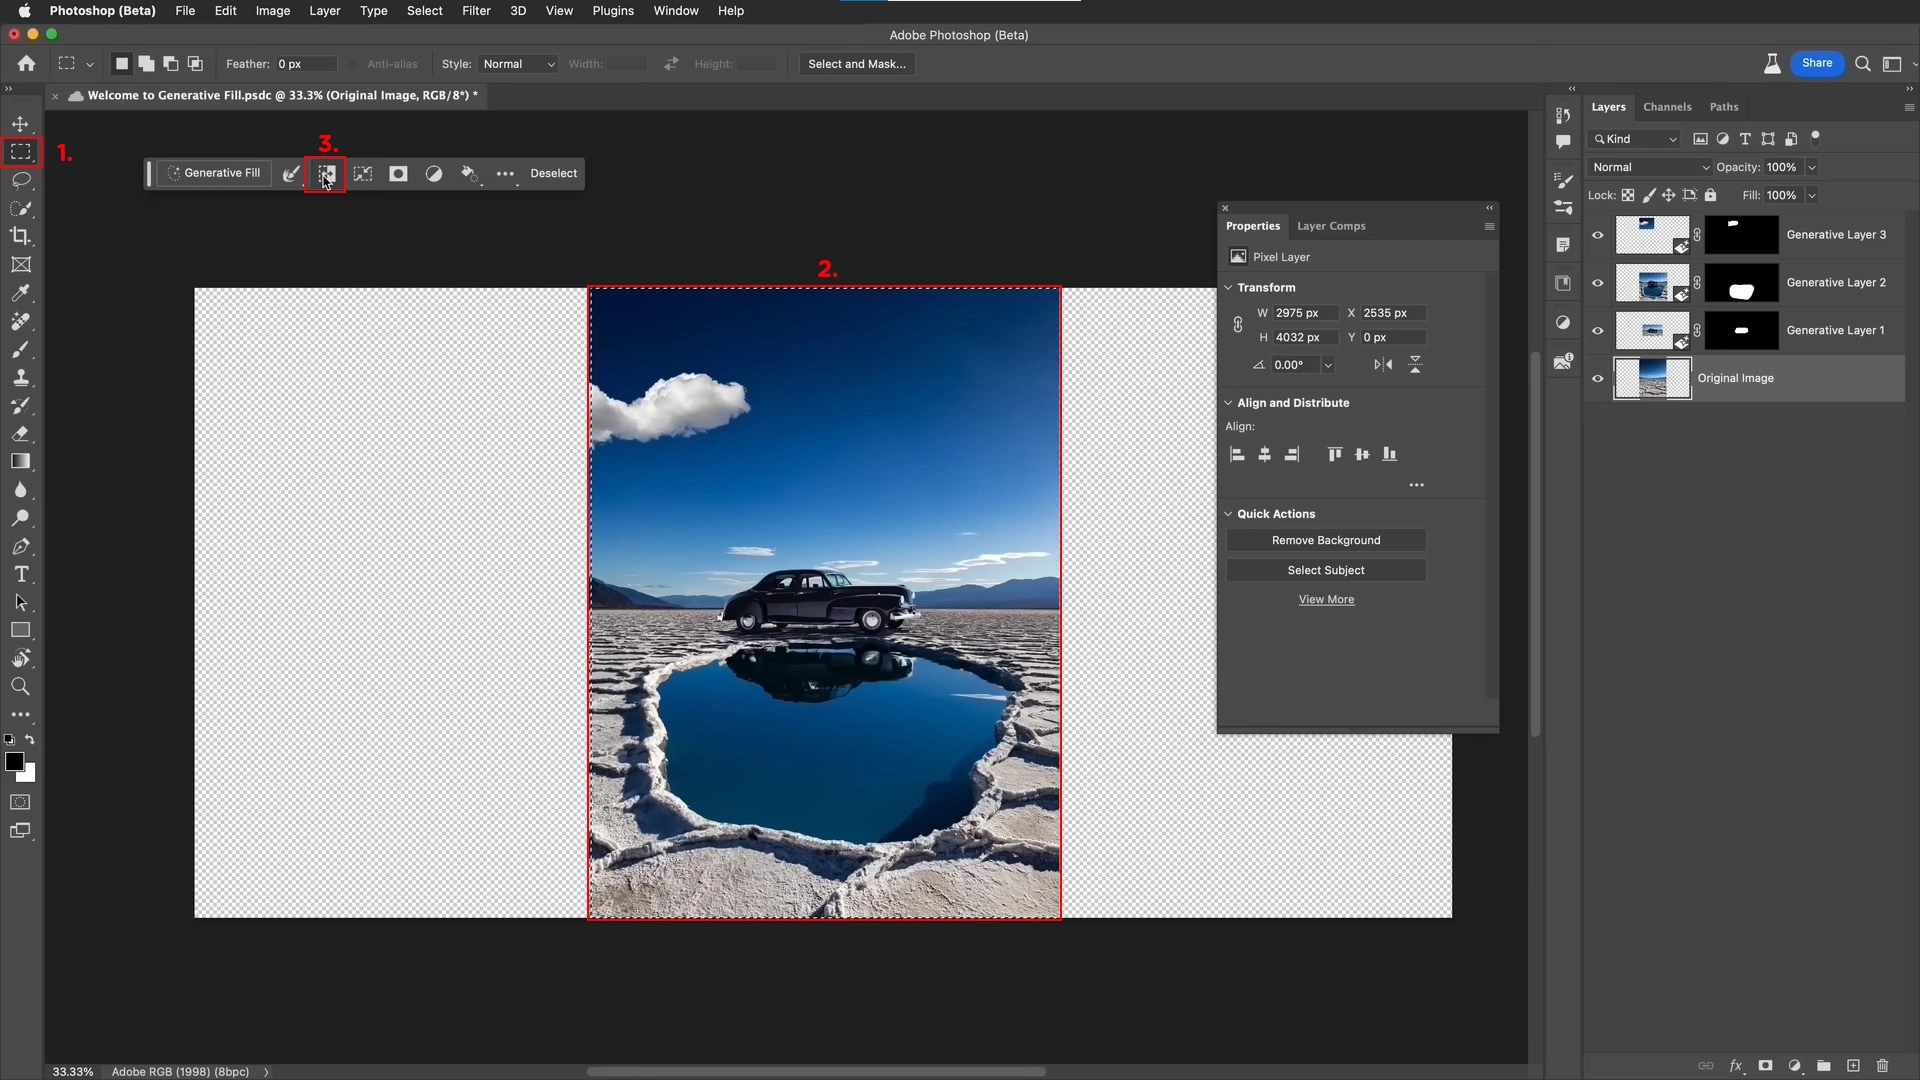
And to finalize this project, once again click on Generative fill. This time we are not giving any inputs, we are going to let the AI technology determine what is outside of the boundary region.
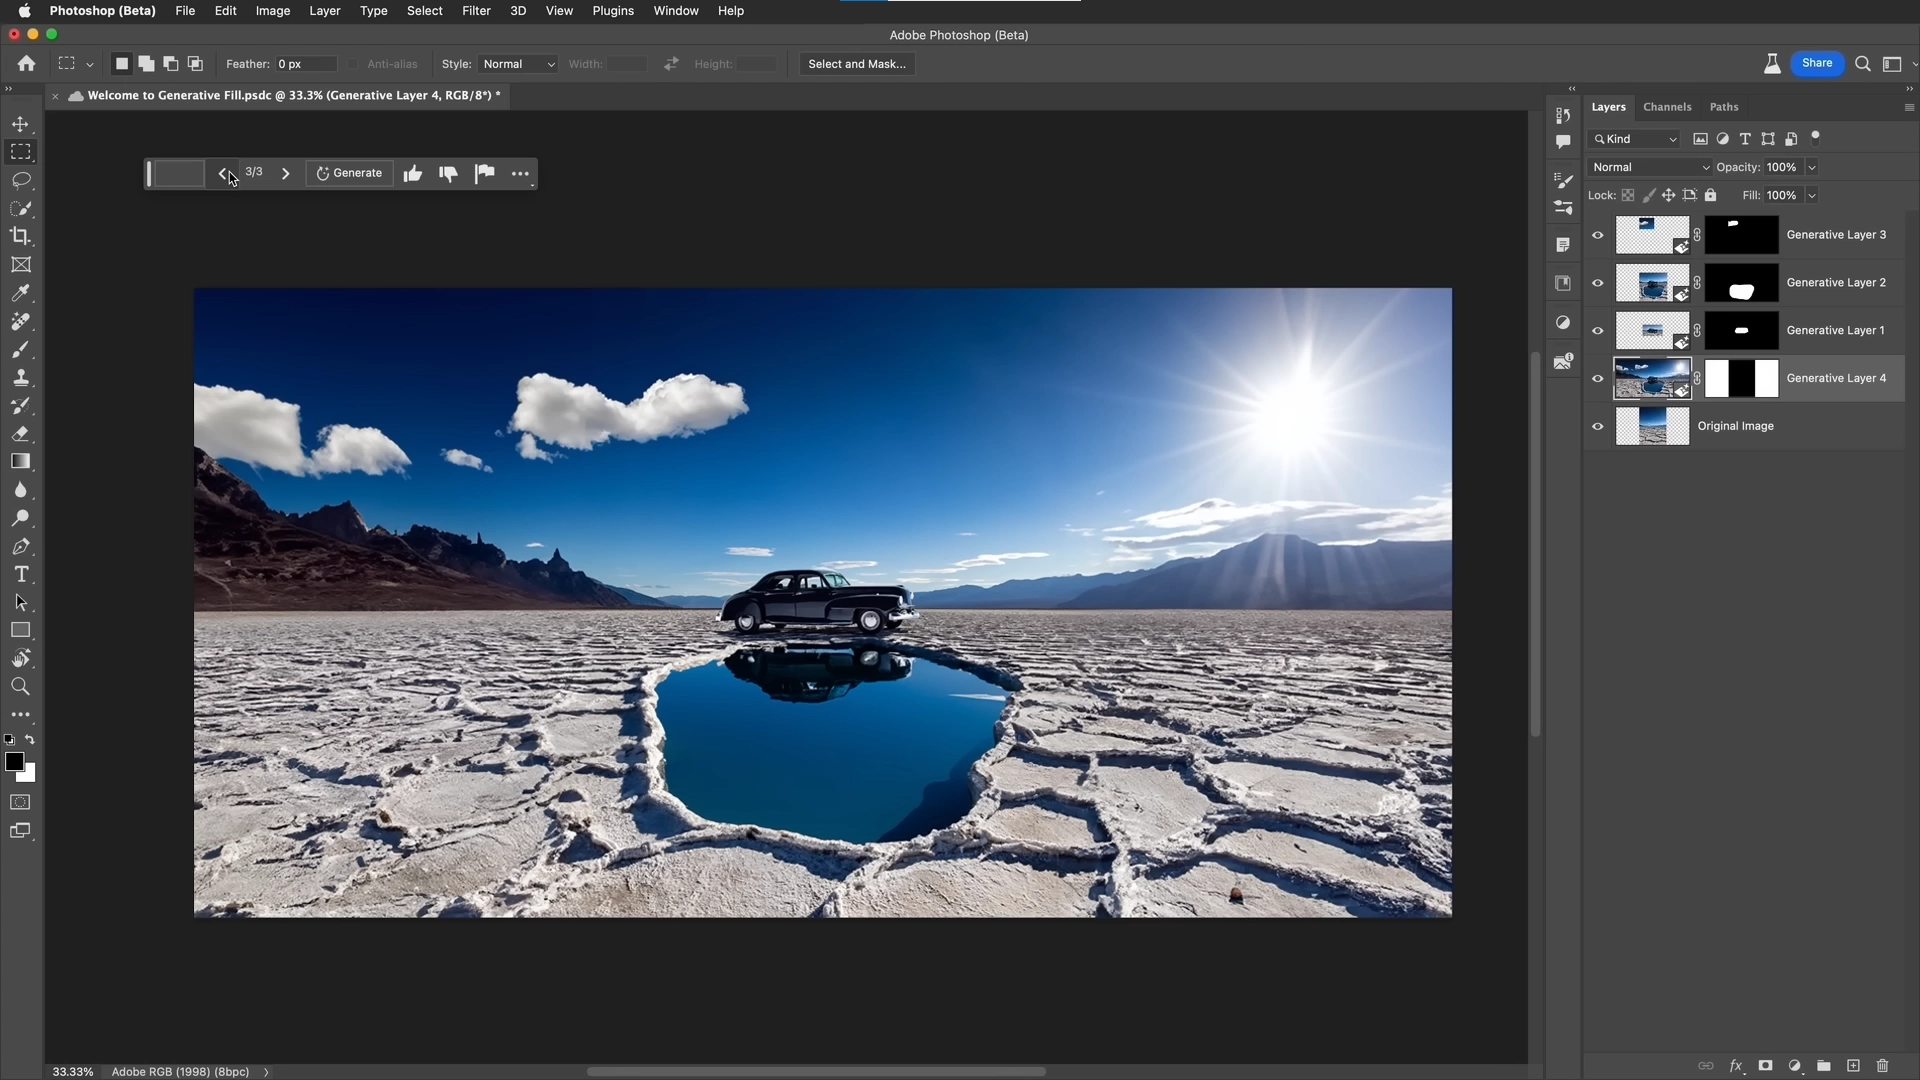
As you can see, Ai perfectly calculated the position of the sun based on the provided shadows in the stock image, the background filled with different types of mountains perfectly aligns with the rest of the image. Everything is pixel-perfect, from the shadows, reflections, clouds, without any distortions.
book a free call
Secure a one-on-one meeting to transform your digital video content. It’s straightforward, impactful, and crafted just for your brand. Expect nothing less than pure results-no fluff, all substance.
